I can’t believe we’re already in week 5 of the One Room Challenge! I truly feel so far behind right now, but I’m hoping I’ll get caught up with everything this weekend. Having to remove the popcorn ceiling myself threw a tiny wrench in things, but at least I saved a lot of money!
Let there be light (and more outlets)
This room doesn’t have the best lighting. While it gets great light from morning until mid-afternoon, the lighting setup is quite lacking. There are only 4 recessed lights in this space. And they’re all in a row. And they’re all on one side of the room. That’s it. No light fixture in the middle of the room. Just 4 lights over to one side.
To be fair, several of the outlets are wired to the light switch, so you could use multiple lamps if you wanted. I’m just not a big lamp person (or a little lamp person). The only reason we have lamps is so I can set them on timers for when we’re out of town and make it look like we’re home.
The only lamp I use is the one on my nightstand. And I have it on a smart switch, so I can turn it on and off using Google routines. I love a good Google routine. I’ll have to share more on that in another post.
This past week, I had electricians replace some recessed lights, install additional outlets, new light switches and get ready for a new chandelier to be installed. Unfortunately, the chandelier I’d purchased wasn’t UL certified, so they were unable to install it. That’s what I get for being cheap.
At least they were able to install a temporary light to tide me over until my new chandelier (the one I should’ve just ordered in the first place) arrives in a few days.
So now I have four new recessed lights, additional outlets higher on the wall where my built-ins will go, and overhead lighting in the center of the room.
Here are the links to the lights and smart switches I purchased. Just a heads up that they’re affiliate links. All that means is if you decide to buy using the link I provide, I get a few pennies at no cost to you.
- Recessed lights (Heads up: Amazon is offering a lightning deal on these right now)
- Smart switch with dimmer
- Chandelier
The built-in bench saga
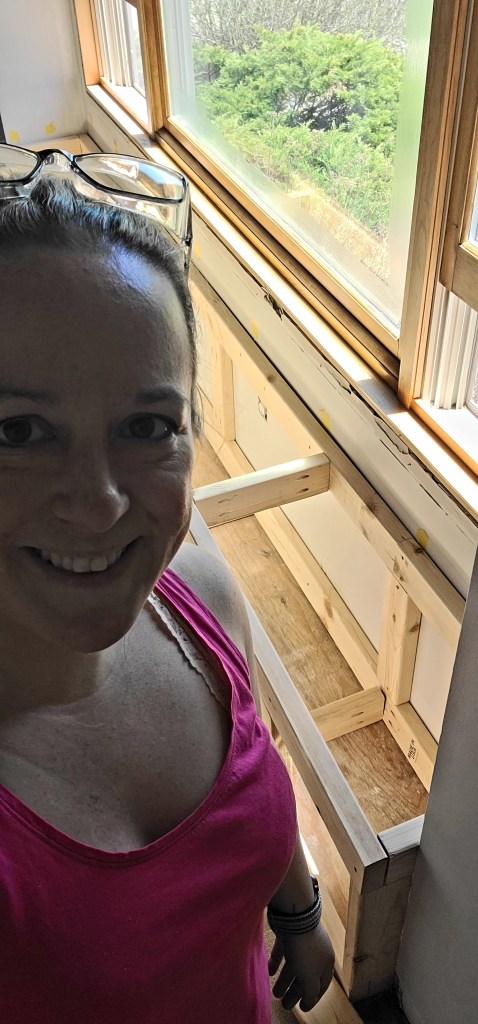
This week, I decided to tackle the built-in bench for under the window. That proved to be more difficult than I thought. Not only do I have a floor vent to take into consideration, but the corners are not square. I mean, what house has perfectly square corners? Certainly not this one!
To get started, I brought in some 2x4s to lay them out and figure out the cuts I’d need to build the bottom of the bench. I’m not going into detail because this entire bench project has been a cluster. I did have to cut out more carpet, which is terrifying as much as it’s fun.
Don’t worry. I saved the carpet just in case I really messed things up.
All I can say is that I must have purchased my measuring tape from Zonko’s Joke Shop because I’d measure about 3 times (every time) before I’d make a cut, used the same measuring tape by the saw, and my cuts were rarely perfect. Mind you, I didn’t expect perfection, but I did expect to be within a sixteenth of an inch.
I finally got to use my new Kreg jig to make a million pocket holes, and it was amazing. I can hook it up to the shop vac while I drill holes, and I’m left with next to no mess. If you want one for yourself, here‘s the link.
It took me a few nights and a little bit of Saturday morning to finally get the shell of the bench finished. Is it level? Yes. Does it look professional? Not even close. That’s where the finishing work comes in. But I did walk across the bench to make sure it wouldn’t fall apart. In hindsight, I probably should’ve asked for a spotter, but I was fairly confident that I had made the bench pretty well. And I’m pretty sure Blake was still asleep when I had finished up.
Oh yeah, don’t look too closely. Apparently, a couple of my 2x4s were not perfectly straight.
Hey, at least it’s level.
The beginning of the wall of built-ins
While I was on a roll with finally getting the bench started, I decided to tackle the built-in cabinets. This part was actually a tiny bit easier because I only needed a small base for the cabinets. The only problem here is that my new baseboards are 5.5″ tall, and the cabinets sit about 4.5″ above the carpet.
That meant that instead of using 2x4s, I was going to have to find something that was an inch. I did get some 5/4 select pine a couple years ago for a different project that I never completed, so I got to pull out the table saw and rip the 5/4 (because the actual size is 1 inch) down to 1″ boards.
No one lost any appendages. No wood came flying back at my face. I consider that a successful table saw adventure.
With the base, I just screwed the 1″ boards directly into the subfloor. Once that was done, it was time to start loading in the cabinets. But not so fast.
I had a couple obstacles to work around:
- Outlets that I still need to access
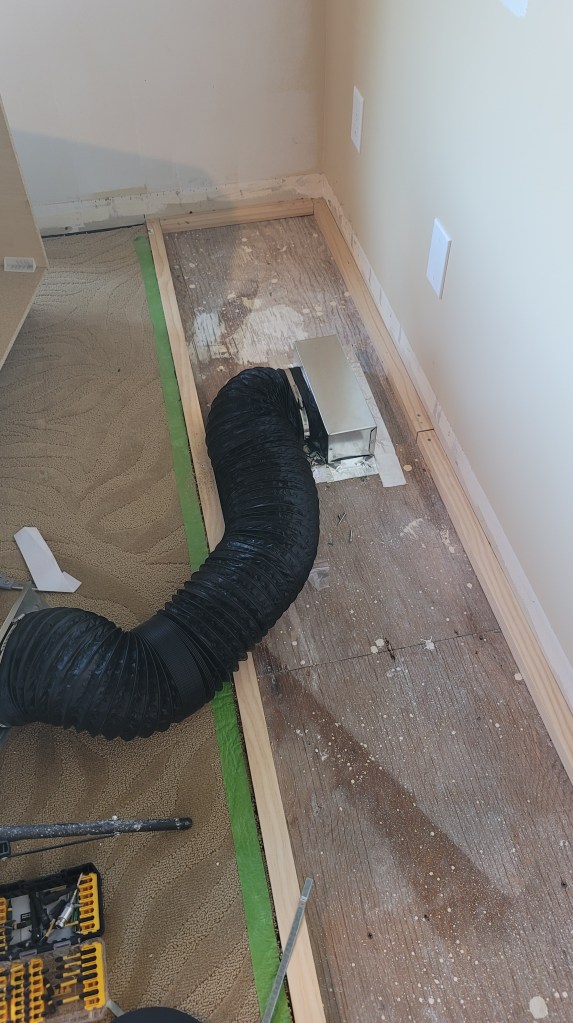
- The pesky floor vent that isn’t centered on the wall
I purchased a Toe Ductor kit (I’ll include the link below) to make my floor vent into a toe-kick (or baseboard) vent. It came with one page of instructions that basically said, “Attach Part A to Part B using the venting tube; attach Part A to floor; attach Part B to toe kick.” It also said to check out their YouTube video for installation instructions, which, honestly, really wasn’t that helpful.
Since the floor vent isn’t centered on the wall, my conundrum is this:
- The floor vent kit was going to extend across three cabinets.
- Two cabinets have either an outline or a telephone outlet I have to cut holes for.
- The vent needed to be centered on the wall, so I would have to cut out part of the base of the center cabinet.
Before I started installing the cabinets, I had to get the floor vent kit set up. I used some water-based duct sealant on the floor surrounding the air vent, as well as on the piece that attaches to the floor. Since I needed to move the air to the middle of the wall, I purchased longer vent tubing (about 8 feet, just to be on the safe side), screwed the piece into the subfloor and surrounded it with a special tape for ducting.
Once the floor vent kit was installed (at least the first part), I was able to cut out a portion of the cabinet that would be sitting over the vent piece. At this point, I had to enlist Blake’s help to move the cabinet over the venting piece. I also had to cut out a piece in the back of the cabinet so I could still have access to the outlet.
On the second piece, I had to cut large rectangles on the left and right sides to allow the vent tubing to fit underneath. I almost didn’t, but I decided to cut a piece for the telephone jack. We don’t have a landline, but hey, you never know.
I saved the middle cabinet for last and focused on getting the other 2 cabinets in place.
Once all the other cabinets were in, I was able to start working on the middle cabinet. The middle cabinet was going to need a large hole cut in the bottom on the left side to allow for the vent ducting, and I was going to have to attach the other end of the vent to the toe-kick section of the cabinet. That meant cutting a large hole in the front of the toe-kick as well.
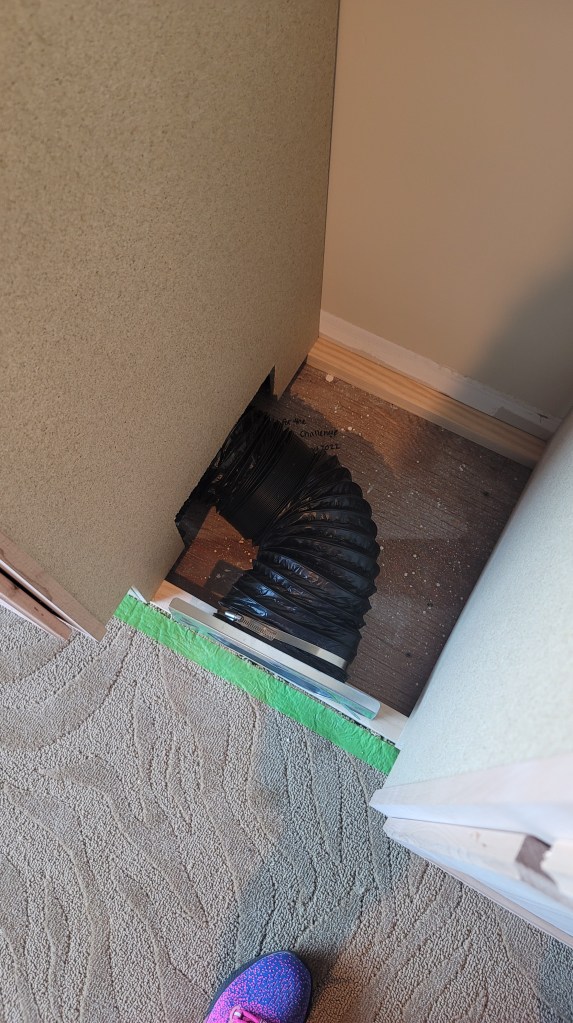
While the cuts aren’t perfect (still working on my jigsaw skills!), the vent fit perfectly, and I was able to get the cabinet in place with 1/16″ to spare on each side.
I was pretty proud of myself for getting the venting figured out and the cabinets in place. I tested a piece of baseboard, and it’s a perfect fit.
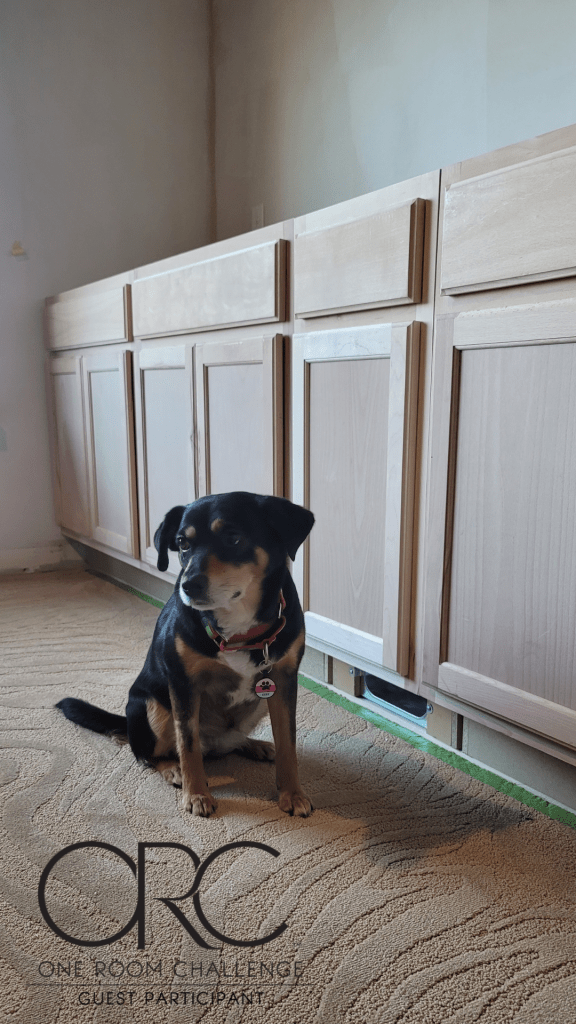
Lilly was pretty impressed, too.
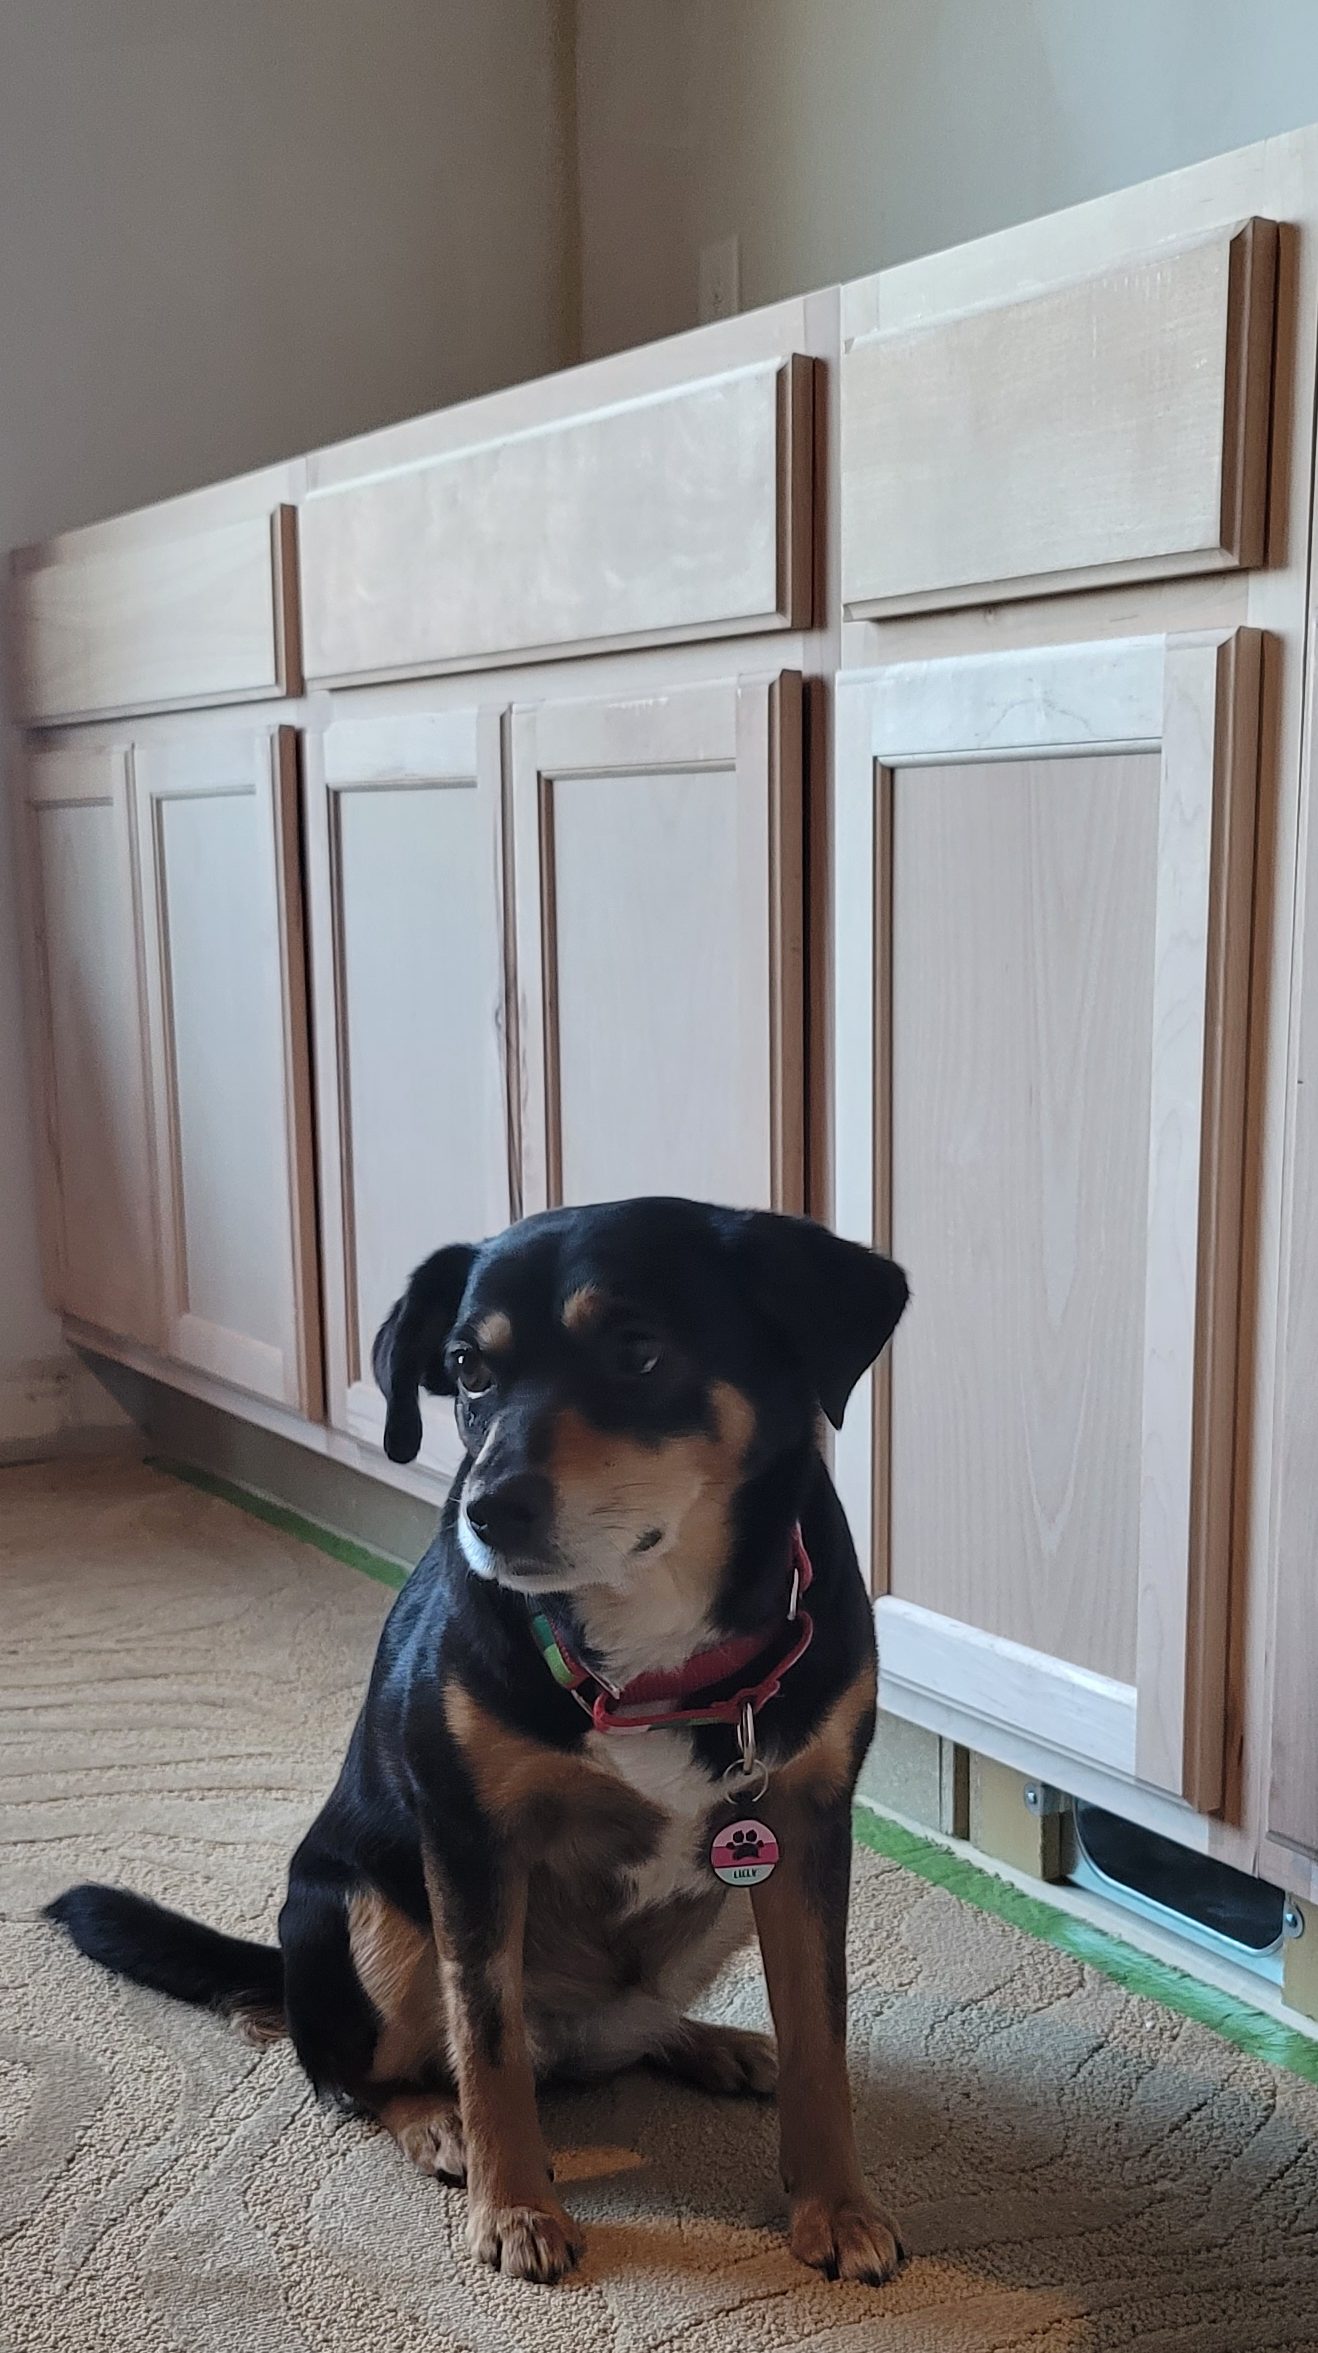
Once everything was in place, and I was able to confirm the cabinets were level and even, I then secured them to each other using 0.5″ scrap pieces between the cabinets, as well as securing them to the studs in the wall. Those cabinets aren’t going anywhere!
Looking ahead to next week
Even though there’s a lot left on my to-do list, getting the skeleton of the bench and the cabinets completed was a huge step (and a huge relief!) forward. Looks like I’ll have to enlist Blake’s help when it comes to cutting the plywood and building the shelves because that plywood isn’t light!
I’m also hoping to get the finishing work done on the bench, along with getting the ceiling completed. It’s a lot to do, but I think I can get it done. Make sure you keep up with my Instagram stories. See you next week!
Here are the links to everything I used to move the floor vent:
