After quite a hiatus, I’m back!
This year, I’m trying to do better with my garden. That means…
- Making a plan
- Sticking to the plan
- Trying new methods
I attempted to plant a garden last year since my 2021 garden was so successful, but I ran out of time, and I just didn’t feel like dealing with the upkeep. Not to mention, we spent a lot of time at our cabin last summer—more than we ever have—so planting a garden wasn’t a priority for me.
That doesn’t mean a garden didn’t grow. One definitely grew. Did you know that lettuce reseeds itself? I didn’t know that. But I do now. And, did you know that tomatoes reseed themselves? Me, either. My tomato plants from 2021 somehow found themselves in almost each of my garden boxes. And, since I didn’t plan to grow anything, they grew outwards of about six feet from each box.
Oh, and something else? The rhubarb that was planted by a previous owner that lives outside our fenced-in backyard? It was magically growing in the garden box closest to the house. That was unexpected.
One goal for this year? Not to let that happen again. I want to be able to keep up with the garden this summer, and then I plan to use as many vegetables as I can while canning the rest to use once our growing season is over. So, let’s get into what goes into my garden.
Making a plan
In hopes I can make Professor Sprout proud, I started planning early this year. That means that I started thinking about this garden back in December. Yes, December.
I’m in a colder climate (zone 4) with a shorter growing period, so I really have to make a plan so I can get the most out of my garden. This starts with knowing my last frost date. For me, that’s April 29—the first day I can start to direct sow or begin transplanting some seeds.
If you need to find your last frost date, you can check out the Farmer’s Almanac here. Enter your zip code, and it’ll let you know your area’s last frost date.
Why is this important? Because it determines when you can begin indoor seeding or directly sowing seeds into your garden. It all hinges on the last frost date.

When you look at the back of your seed packets, you’ll see different directions, such as:
- “Start seeds indoors 6-8 weeks before last frost.“
- “Plant seeds directly in the garden after average last frost date…”
- “Plant seed directly into the garden starting 1-3 weeks after average last frost date.“
It can be overwhelming to keep everything straight, especially since a lot of seeds have different instructions. So, a few years ago, I made a spreadsheet with these details. And I set up a quick calculation that allows me to enter my last frost date, and then it will tell me when to begin seeding, whether it’s starting indoors or if I direct seed.
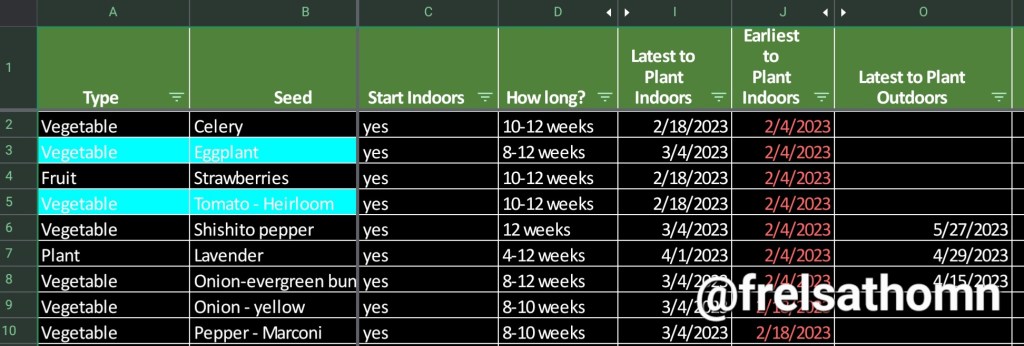
This spreadsheet currently has about 70 different types of seeds and the information for each. It works for me for now, but eventually, I’ll either include more details, like germination timeframes, additional spacing details, etc., or I’ll create a little website for myself that will calculate things for me, set reminders, etc. But that’s another project for another day. Not something I’ll tackle any time soon. If I do, I’ll let y’all know.
Knowing that the earliest I’d need to start planting indoors, I started to make a list of what I’d need:
- Seeds (duh)
- Rolling shelves for my seed station
- Grow lights
- Warming mats
- Potting/seed starting soil
- Markers
- Pots
- Seed trays
- Shower curtains with rings
- Chains to hang lights
- Patience
- Sanity
Luckily for me, I already had many of these things on hand, but I did order some new seeds through Bucktown Seed Company. They’re a family-owned small business, and I want to support that. I’ve ordered seeds from them for the last few years, and I haven’t been disappointed. The shipping is incredibly fast, and the seed packets come so nicely wrapped.
I did end up buying new shelves that are collapsible for easy storage, so that I’d be able to add them to my “gardening” section in the garage and know they’d be safe from my husband. The grow lights and warming mats I’ve had for a couple years now, along with the seed trays. But I did order a different kind of soil, new pots, shower curtains (I’ll explain in a minute), and chains to hang the lights.
If you’d like to see what I’m using for my seed station, I’m including links to everything below. Please note that these are affiliate links, so if you click on them and decide to buy something (which you do not have to do!), it just means I get a little commission (seriously, pennies) at no cost to you.
- Rolling shelves
- Grow lights
- Warming mats
- Potting/seed starting soil
- Pots
- Seed trays
- Chains to hang lights
Check out my Instagram reel to see how I got everything set up. (Yes, Instagram did me wrong with my intro and outro.) I didn’t go into detail with the shower curtain, but I attached the curtain to the back of the shelves and around the sides to help keep any moisture from getting to the windows/wood trim. I also placed another curtain under the shelves to catch any water drips or spills.
Sticking to the plan
So far, it’s been relatively easy to stick to my seedling plan. I mean, come on…we’re only a few weeks in. But I do check on my plants each day to see which ones have germinated and to make sure they’re not thirsty.
This upcoming weekend, I get to start seeds for the following:
- onions
- peppers
- artichokes (if I choose to…still on the fence about this one)
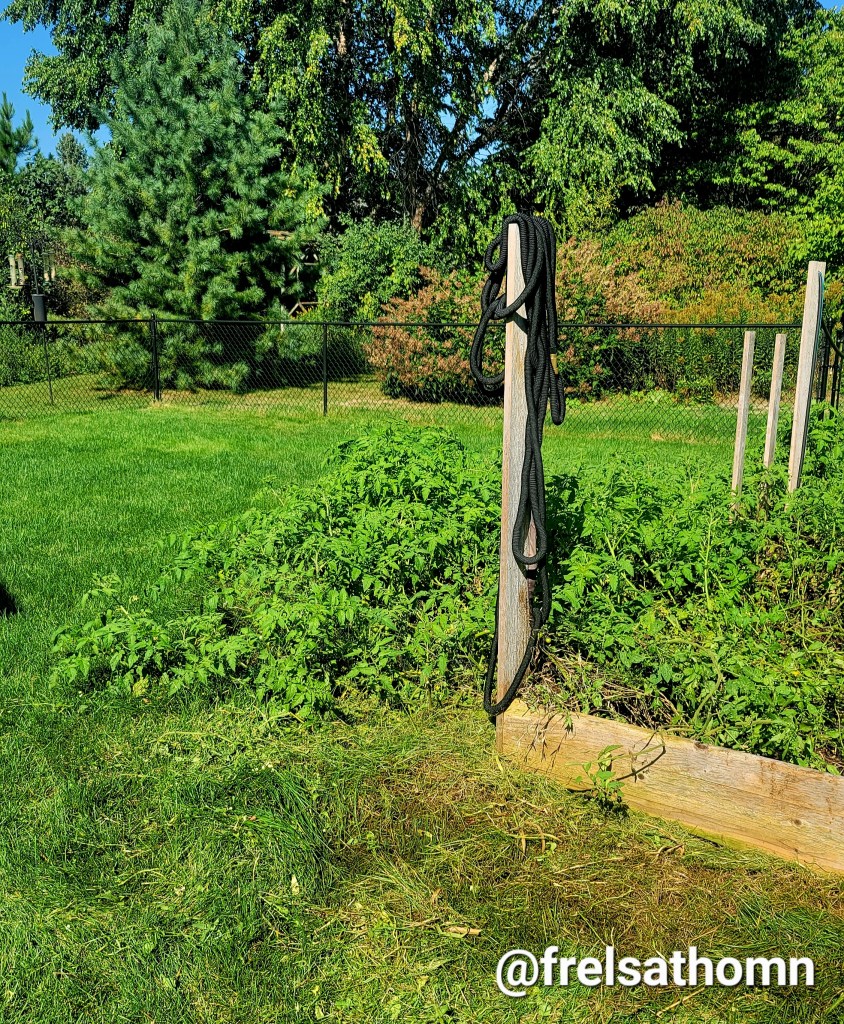
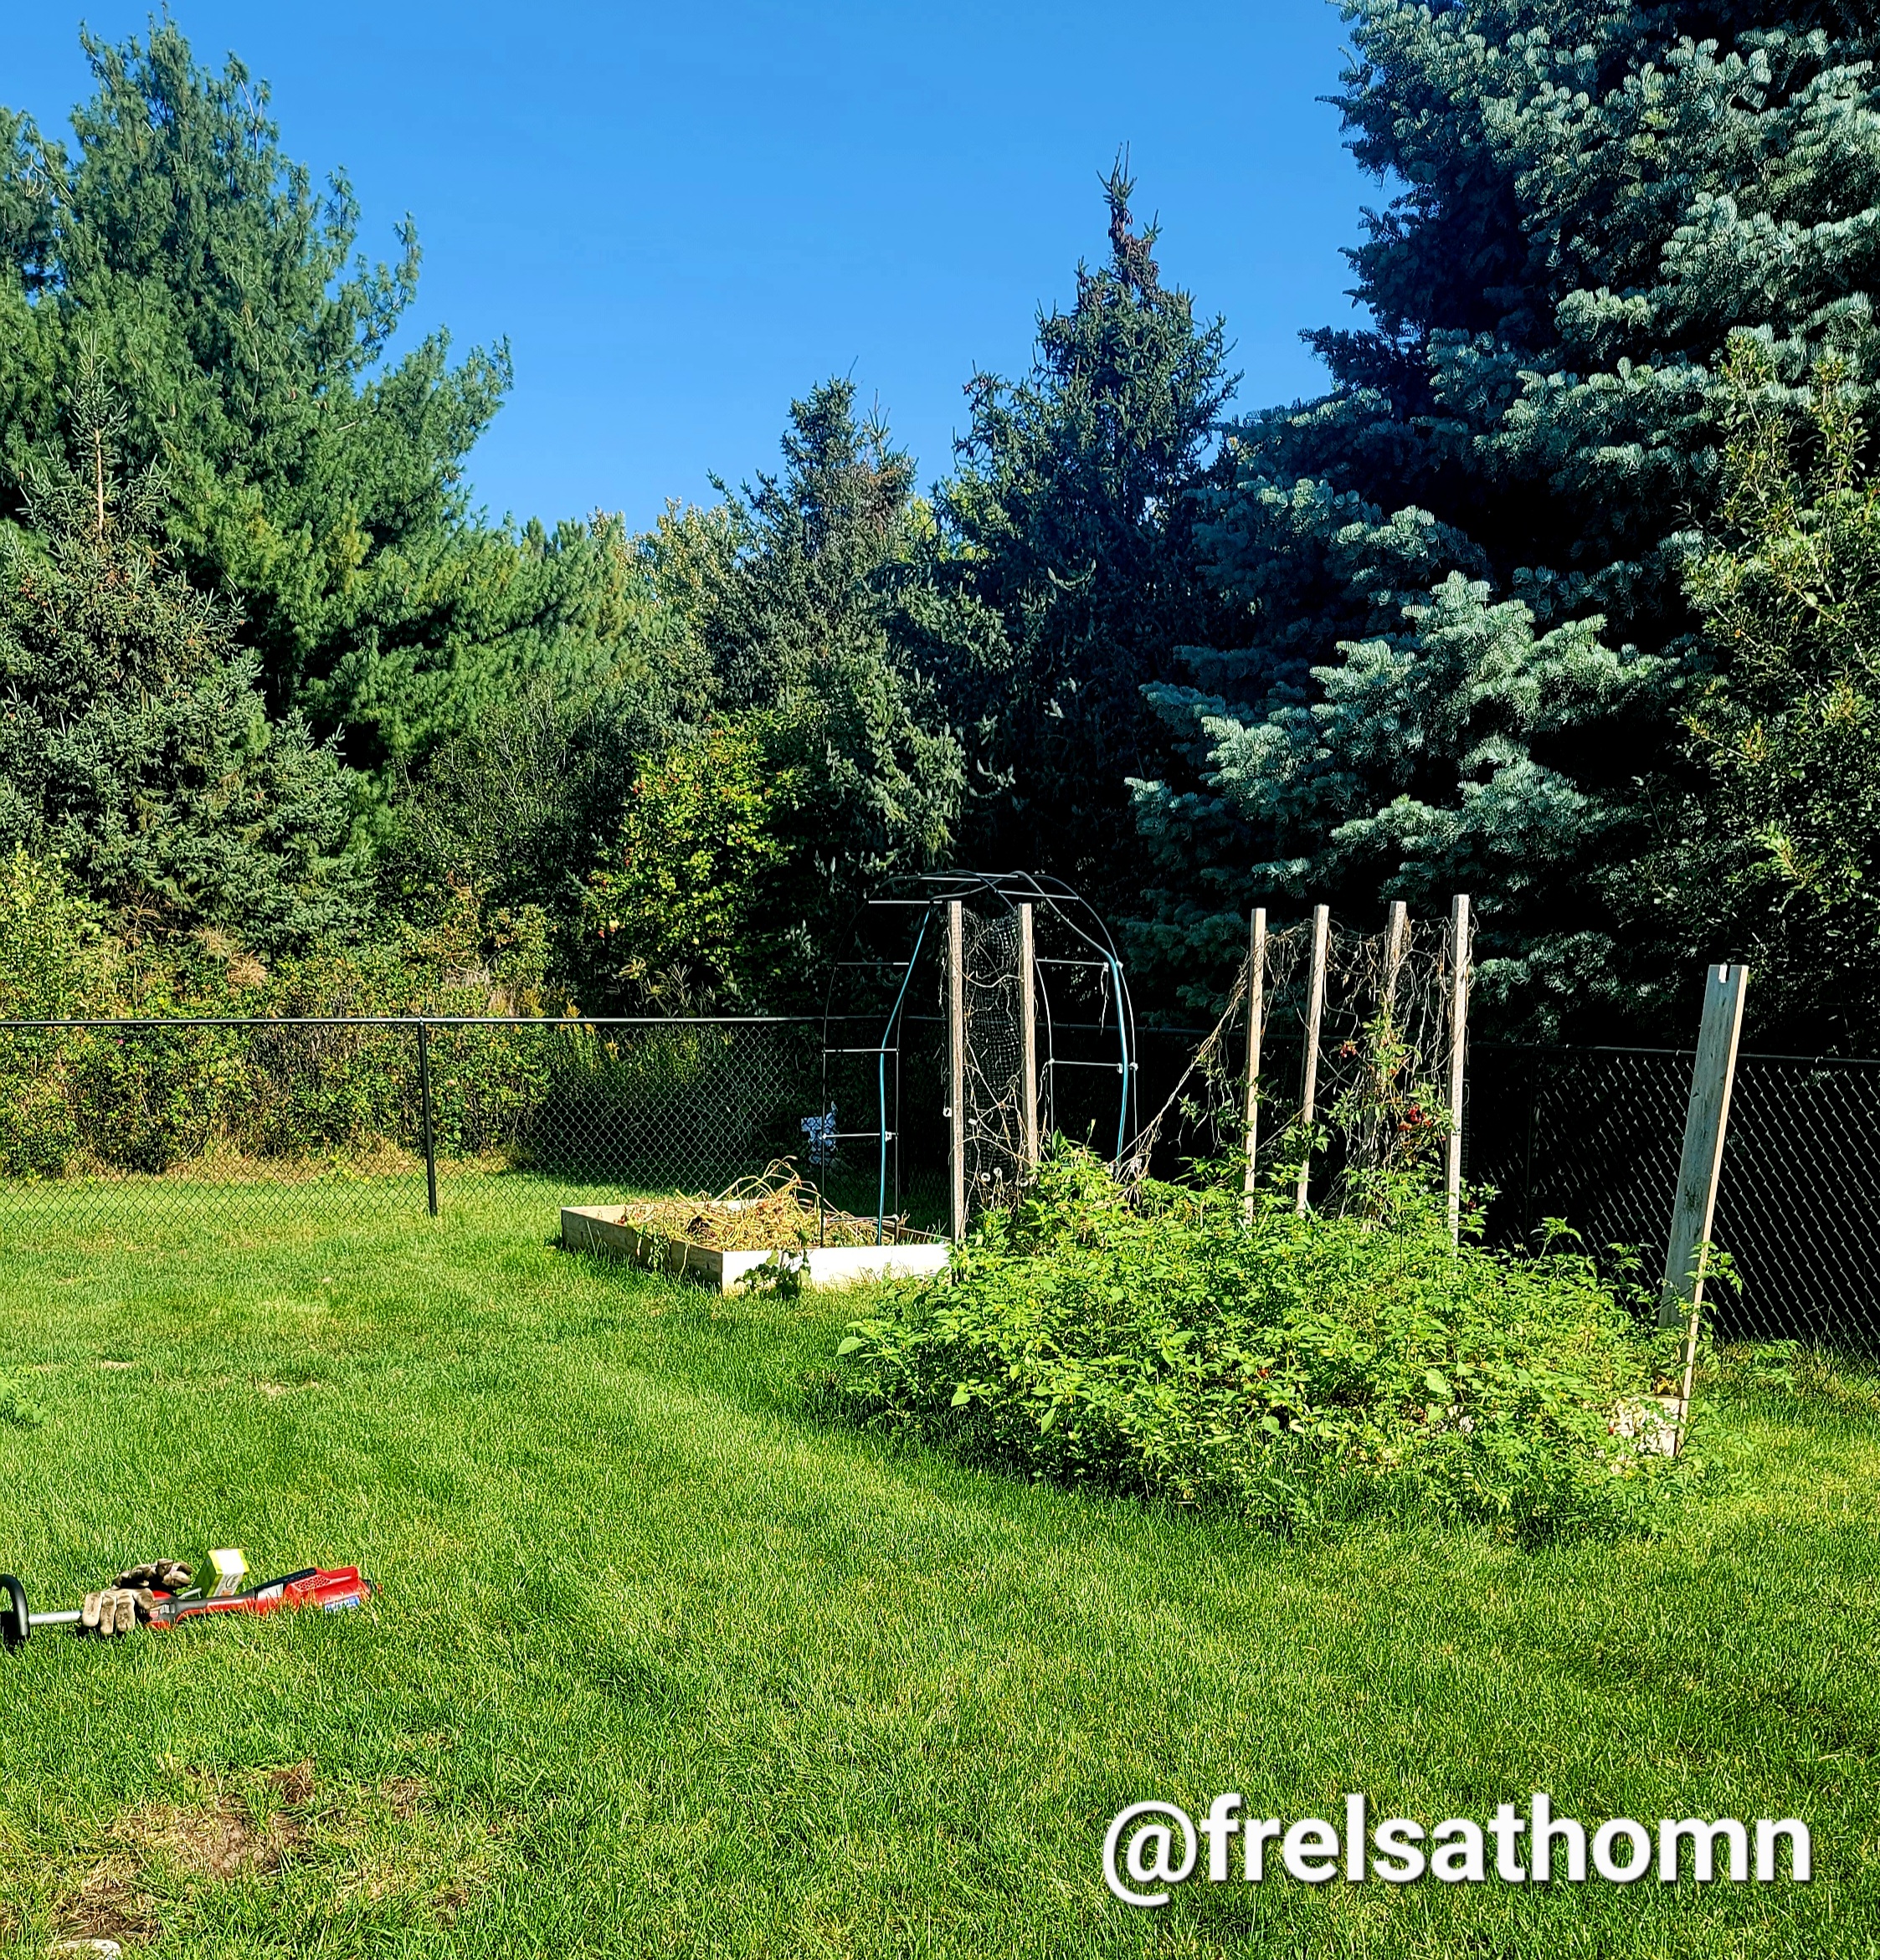
Something else I’ll be adding to my plan is figuring out exactly where seeds will go in my raised beds. At this time, I have four boxes that are 4’x8′, one box that’s about 2’x3′, and one that’s L-shaped and is basically a 4’x8′ and 4’x4′ combined. I’m still considering building another smaller box (maybe 2’x8′) specifically for flowers.

One issue I ran into a couple years ago was not having enough pollinators to get my squash to grow. I didn’t know about hand pollinating (i.e., the DIY of pollination). So, I want to add more flowers to the garden this year, and I may just need one more box in the middle of it all to help with that. I’ve also considered building bee boxes to encourage pollinators to make themselves at home in my garden.
In all honesty, I could probably add about two more skinny boxes in the middle, but I have to keep mowing the lawn in mind.
Still have a ways to go with planning, but we’re sticking with the plan of getting seeds started, at least.
Trying new methods
Based on my own trial and error (and what I’ve seen on Instagram), there are a few things I’m changing up this year. I’m also going to try a few new methods of starting my seeds and planting my garden.
- I’m not planting corn again. I just couldn’t seem to harvest at the right time. It was either too early or too late. And then Gurley started tearing down the stalks and eating whatever corn was left.
- Following directions on the heating mats. I didn’t do this last year and couldn’t figure out why my soil was growing white mold. You’re supposed to take seedlings off the heating mats once they germinate. Now I know. Reading directions is important.
- Using bigger starter pots for transplant-sensitive plants. Some plants won’t survive being transplanted into the garden very well, so I got bigger pots for them to start out in. This means they’ll only have to be transplanted once in the spring.
- Enlisting the help of tomato cages and trellises. I made the mistake two summers ago of thinking that a stake would be enough to hold my tomato plants. I was wrong. Halfway through the growing season, I had to create mock cages out of scrap wood and twine to make them grow up instead of out. I did use a trellis archway for my cucumbers and peas, but I grossly misjudged how much the cucumber vines would grow. I had to make up my own trellis with more scrap wood and deer netting to keep the cucumbers growing vertically. This year, I have tomato cages and multiple trellises to help with containing these plants and helping them grow up.
- Hardening off plants correctly. I didn’t have a good plan to harden off my seedlings last year, and they all died. Partially, because it was supposed to rain and we left for a few days, it didn’t rain, and we hit record high temps. This year, the seedlings are on rolling carts that will eventually move to the garage so I can easily roll them in and out of the sun, as needed.
Class dismissed
With my first set of seeds slowly sprouting, I’m off to a great start. I’ve moved about 8 seedlings from their humidity domes and heating mats, and now they’re basking in the fake sunlight I’ve created with my LED grow lights. And no, the mandrakes aren’t ready yet. I’ll let you know when they are. In the meantime, you’d better find your ear muffs.
You can follow along on their progress via Instagram.

One comment